Free Computer Programming Training From Google Code University

Google Code University offers free training for computer programming. The training consists of a website which contains training materials such as slide shows, videos, and problem solving sets. Here is an excerpt from the Google training website which describes the training offered:

This website provides tutorials and sample course content so CS students and educators can learn more about current computing technologies and paradigms. In particular, this content is Creative Commons licensed which makes it easy for CS educators to use in their own classes.

The Courses section contains tutorials, lecture slides, and problem sets for a variety of topic areas:

  • AJAX Programming
  • Distributed Systems
  • Web Security
  • Languages

In the Tools 101 section, you will find a set of introductions to some common tools used in Computer Science such as version control systems and databases.

The CS Curriculum Search will help you find teaching materials that have been published to the web by faculty from CS departments around the world. You can refine your search to display just lectures, assignments or reference materials for a set of courses.

Here is a link to the Google Code University website: Link

Google Logo

Error When Compiling PHP in CentOS 64 Bit

Library files in CentOS 64 bit are stored in the directory /usr/lib64. But in normal 32 bit CentOS, library files are stored in /usr/lib so this causes a problem when trying to compile source code that looks for library files in /usr/lib. When using the default configure options for compiling PHP, the directory /usr/lib is searched for library files so if you have any 64 bit applications installed, their associated library files will not be found. For example, trying to compile PHP with the configure option:

--with-mysql=/usr

will result in the error:

/usr/bin/ld: cannot find -lmysqlclient

You can fix this MySQL error and other configure errors relating to library files not being found by adding the following option to the configure line:

--with-libdir=lib64

Code

How to Install VMWare Tools in CentOS 5

Install software needed by VMware Tools

1. Install packages to build the kernel modules

yum install gcc kernel-devel

2. Check the running kernel matches the kernel headers

uname -r             # running kernel
rpm -q kernel-devel  # installed kernel headers

3. If the two versions do not match, run

yum -y upgrade kernel kernel-devel
reboot

4. Find out where the kernel headers are (you may need this later)

ls -d /usr/src/kernels/$(uname -r)*/include

Prepare and install VMware Tools

1. From VMware Workstation: go to VM> Install VMware Tools

2. From the VM: mount the virtual cd drive

mount /dev/cdrom /mnt/

3. Extract VMware Tools to /tmp/

tar -C /tmp -zxvf /mnt/VMwareTools-5.5.3-34685.tar.gz

4. Unmount the virtual cd drive

umount /mnt

5. Now run the installer

cd /tmp/vmware-tools-distrib
./vmware-install.pl

6. When asked Do you want to run vmware-config-tools.pl?, answer “Yes”.

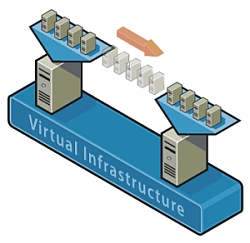
VMWare Infrastructure

Installing Windows XP x64 with AHCI Enabled on a Gigabyte GA-P35-DS3R Motherboard

There are two SATA controllers on the motherboard. The Intel SATA interface and the Gigabyte (JMicron) SATA interface. In order for AHCI to work with the Intel SATA interface, you must install the drivers at Windows install time or you can perform a hack after Windows is installed. Here is what you need to do for a clean install of Windows XP x64:

  1. Make the Windows x64 “pre-installation” driver floppy disk for the Intel SATA controller. You can get this off the Gigabyte website with the other motherboard drivers.
  2. In the BIOS enable AHCI for the Intel interface but set the Gigabyte SATA interface to “IDE” mode. If you don’t set the Gigabyte interface to “IDE” mode then the Windows setup program will not see drives connected to that interface.
  3. Boot off the Windows XP x64 installation CD and press “F6” when the installation program prompts to do so in order to install the Intel SATA interface drivers off the driver floppy disk you made in step one.
  4. Complete the installation of Windows XP x64.
  5. Download the Gigabyte SATA interface driver from the Gigabyte website and install it in Windows. Then reboot the computer.
  6. When the computer reboots, enter the BIOS
  7. Enable AHCI for the Gigabyte SATA interface and then save the change.
  8. When Windows XP x64 boot, it should recognize the AHCI mode of the Gigabyte SATA interface and install the drivers. Then it will prompt you to reboot.
  9. After Windows XP x64 reboots, the Gigabyte SATA interface will now be in AHCI mode.

Gigabyte GA-P35-DS3R Motherboard