There doesn’t appear to be an available manual when searching the internet so adding it here for reference for those that need it.


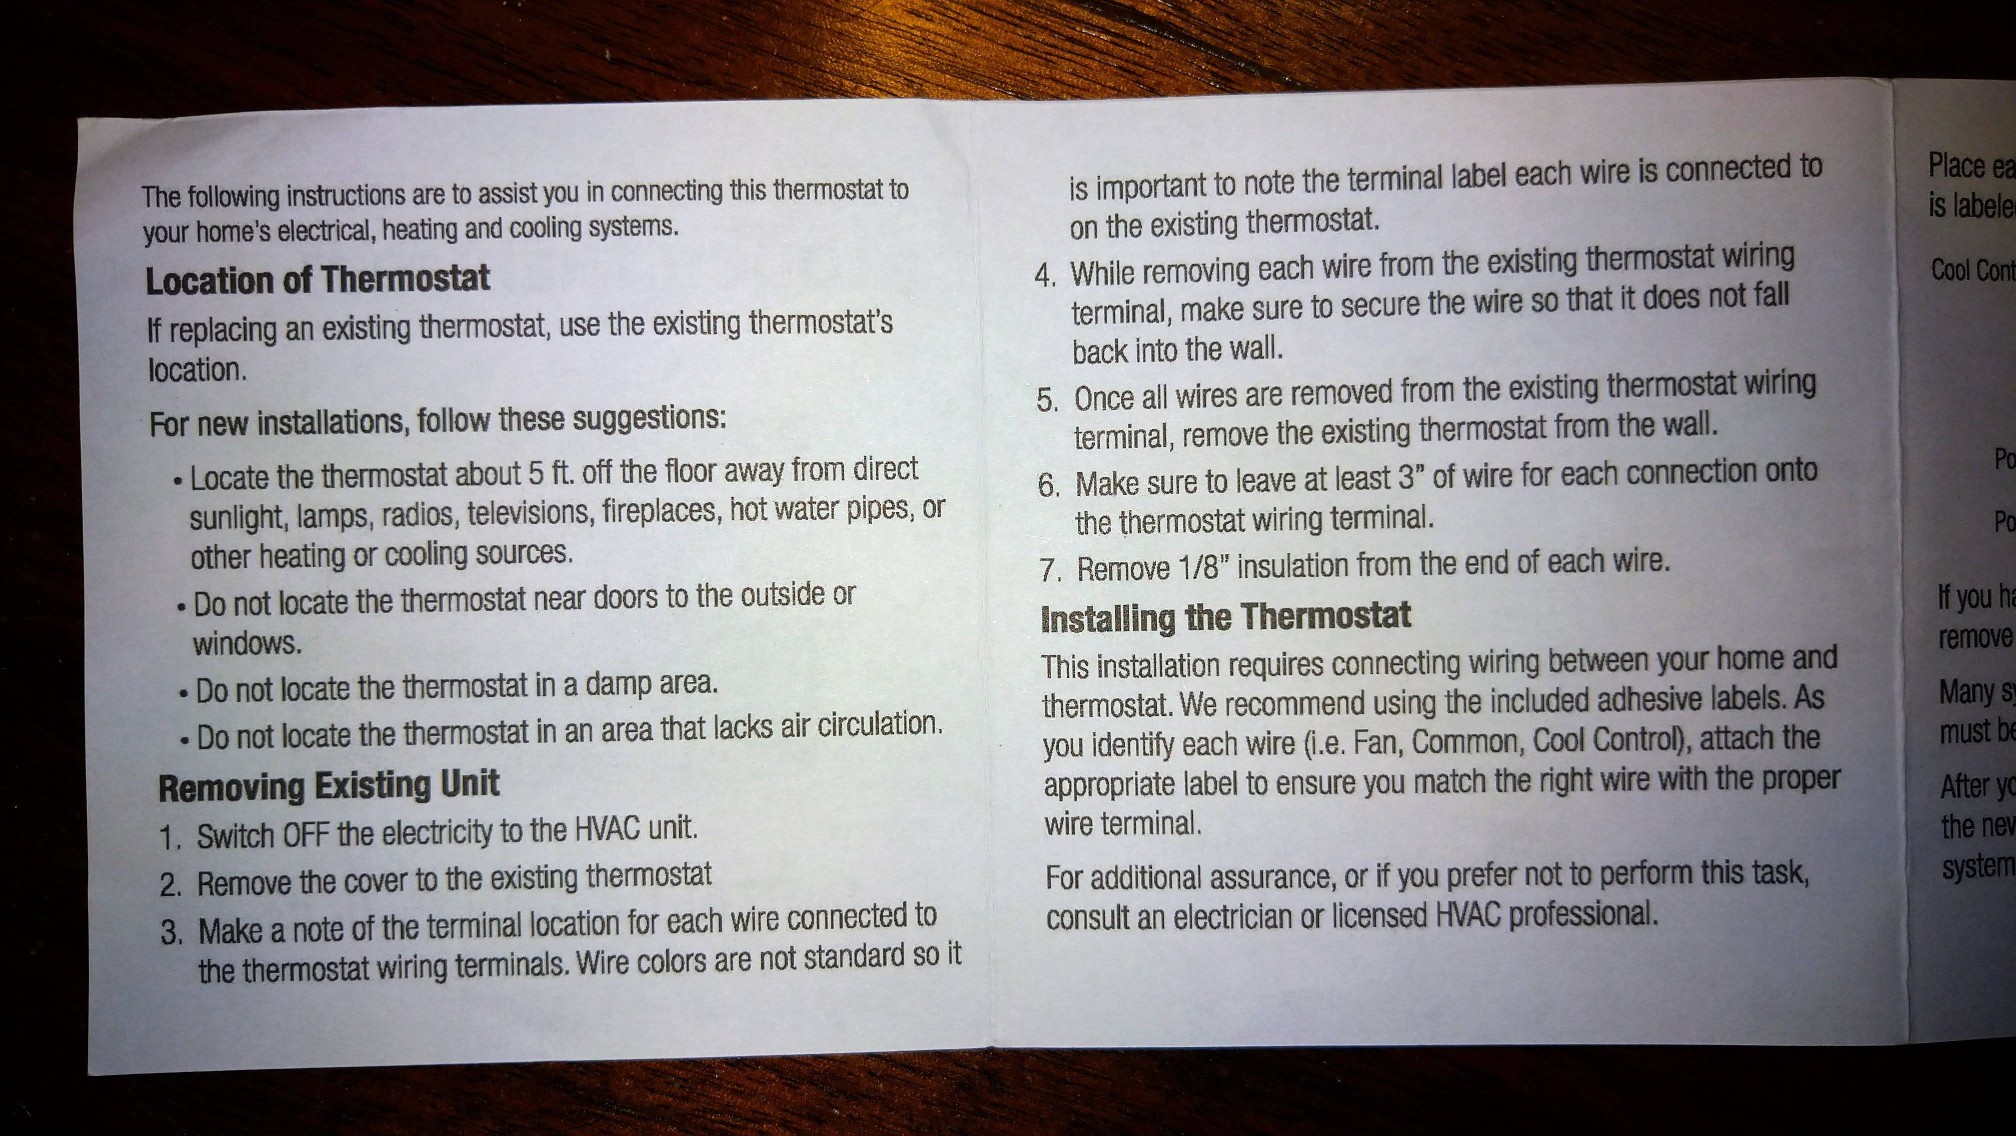
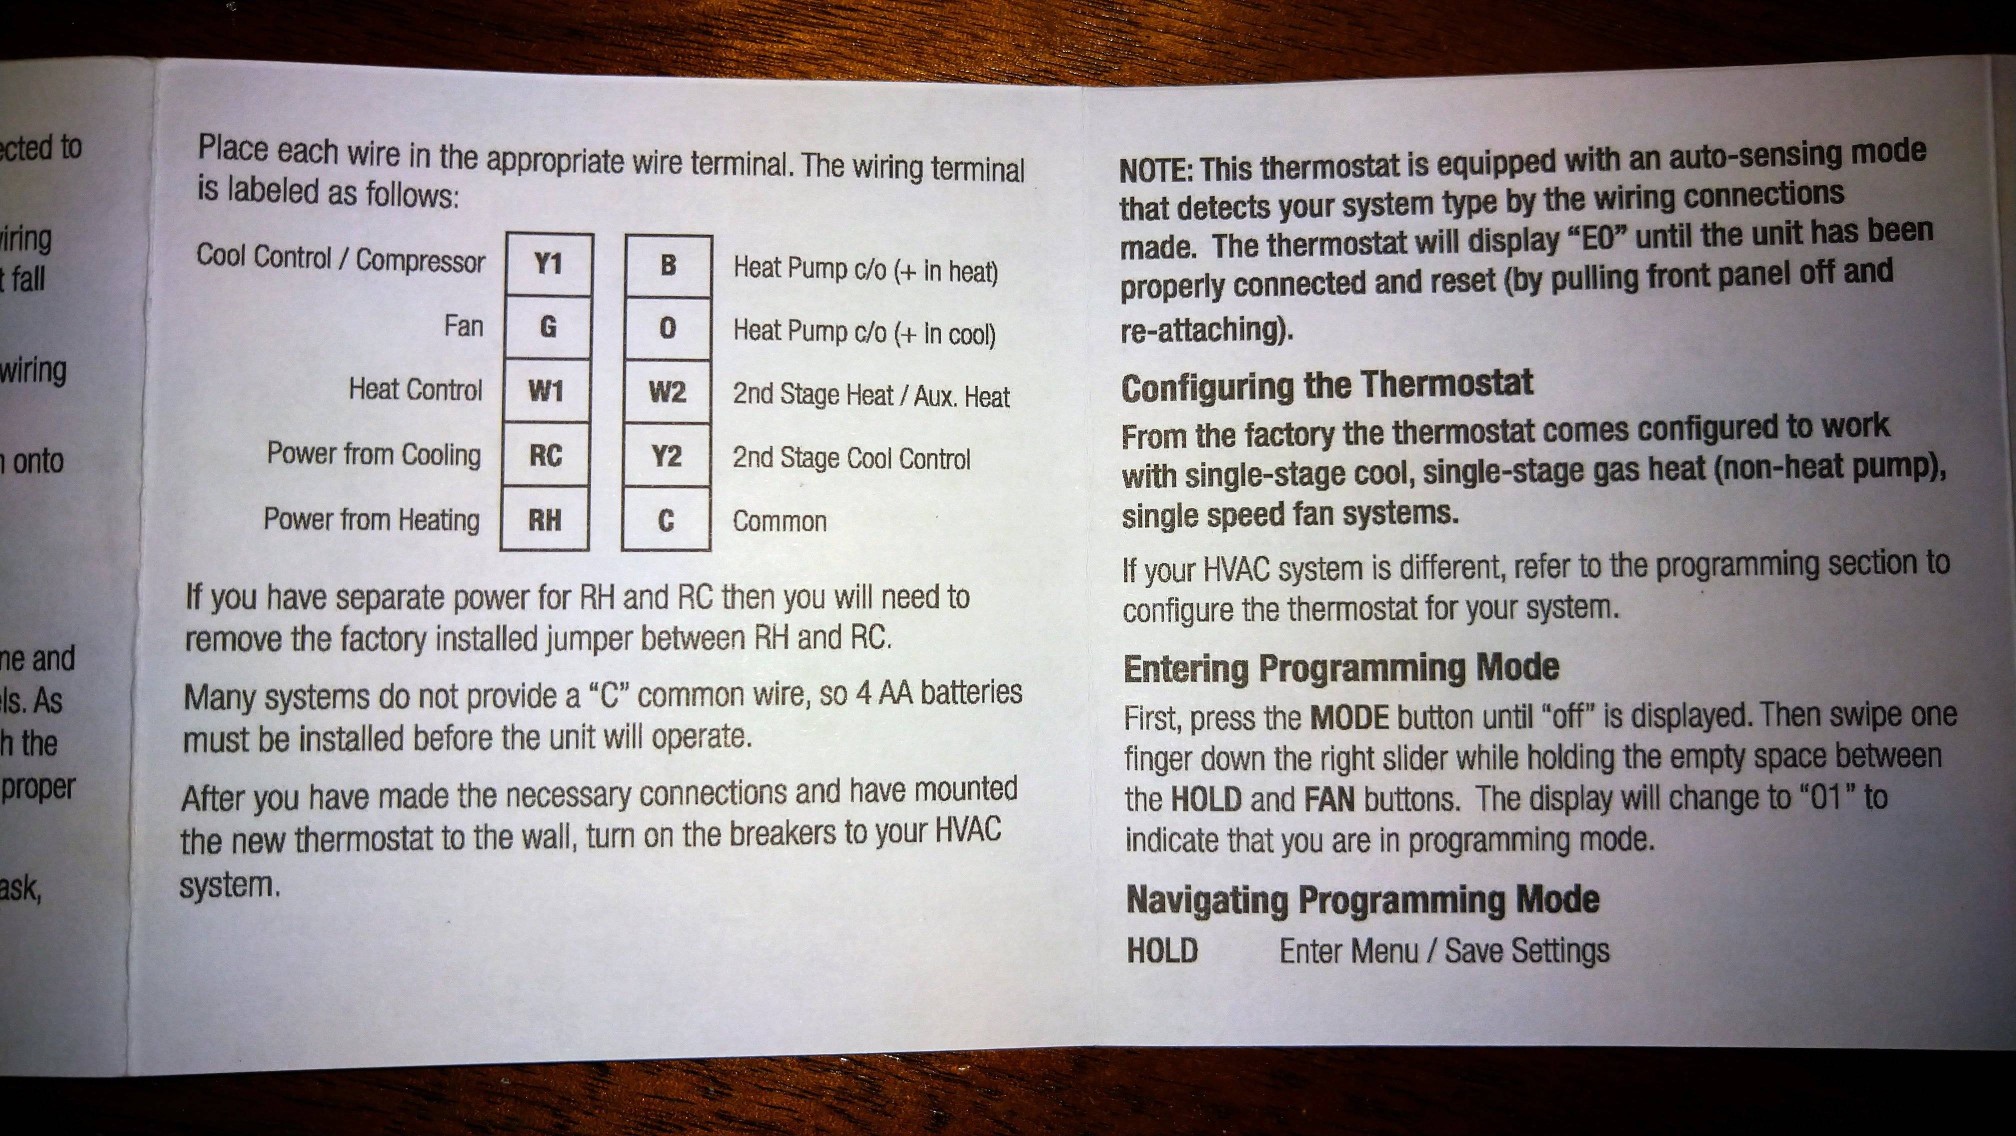
There doesn’t appear to be an available manual when searching the internet so adding it here for reference for those that need it.
As of October 2023 the current version of the Microsoft Authenticator app for Android does not offer a simple way to disable Passwordless sign-in once you enable it on a phone. The only way to disable this is to completely uninstall the app from your Android phone and then reinstall the app again. After the app is re-installed the passwordless sign-in option will be disabled and you’ll once again see the option to enable it if you want to.
If you have the Microsoft Authenticator app for Android installed on multiple phones you may have the problem that whenever you sign into a Microsoft app or service the sign-in notification is always sent to the Microsoft Authenticator app on your old phone or the first phone you enabled passwordless sign-ins with. As of October 2023 the only way it appears you can have these notifications sent to your newer phone is to totally uninstall the Microsoft Authenticator app from all phones but leave the app installed on just the phone you want to receive these sign-in notifications to. Once you do this confirm when you try to sign into a Microsoft service you get the sign-in notification to the phone you want it to go to. Once you confirm this you can re-install the Microsoft Authenticator app onto your other phones but don’t enable the passwordless sign-in option on these phones. Even if you do, the notifications should still only be sent to your new phone. It appears the passwordless sign-in notifications can only work with one phone and it only works with the first/only phone you set it up on.

If you change a computer’s MDM configuration in Apple School Manager (ASM) or Apple Business Manager (ABM) after a computer has already started Setup Assistant, then the computer may be in a state where it is trying to enroll to a previously configured MDM server before you changed it in ASM/ABM. This may result in the computer giving a 500 MDM server connection error when you try to proceed past the “Remote Management” screen in Setup Assistant. Big Sur seems to not try to refresh this cached MDM info once it pulls it down for the first time. Not sure how later macOS versions behave in Setup Assistant. Big Sur and later versions of macOS make it a non-trivial process to delete the MDM cached info. For Big Sur and later do the following to clear out the Setup Assistant cached MDM enrollment settings:
After updating to Android 10 from Android 9 on a Sony Xperia 10 Plus phone, you may notice some apps no longer able to use your phone’s microphone. When you attempt to use affected apps, the app will act like your microphone is not working on your phone. For example on affected phones, when you try to use the Zoom or Viber video conferencing apps, people will be able to see your video but not hear you talking.
Various Google search results may lead you to try to totally disable or remove/uninstall the “Google” or “Google Play Services” apps but this fix will cripple your phone and you will not be able to use some Google phone functions and apps. An alternative solution you may find is to just “deny” the microphone privileges to these apps but this will also cripple some functions of your phone. Yet another solution you may encounter in Google searches is to disable the Google Assistant’s “ok google” voice activation feature.
The best solution that worked for me is to disable the “Google” app permission for “Allow display over other apps“. Once I did this, all apps I was having problems with starting working again and from what I can tell all Google app related functions still work including the voice activation feature of Google Assistant. Even after a phone restart, everything still works. I believe what is happening is the “Google” app is running in the background and keeping a hold on the microphone. Only one app at a time can use the phone’s microphone so since the “Google” app is still running in the background and keeping a hold on the microphone, no other app can use it. Disabling the “Allow display over other apps” permission of the app allows other apps to take over use of the microphone when they are brought into the foreground.
Here is the step-by-step procedure to disable the “Allow display over other apps” permission for the “Google” app:
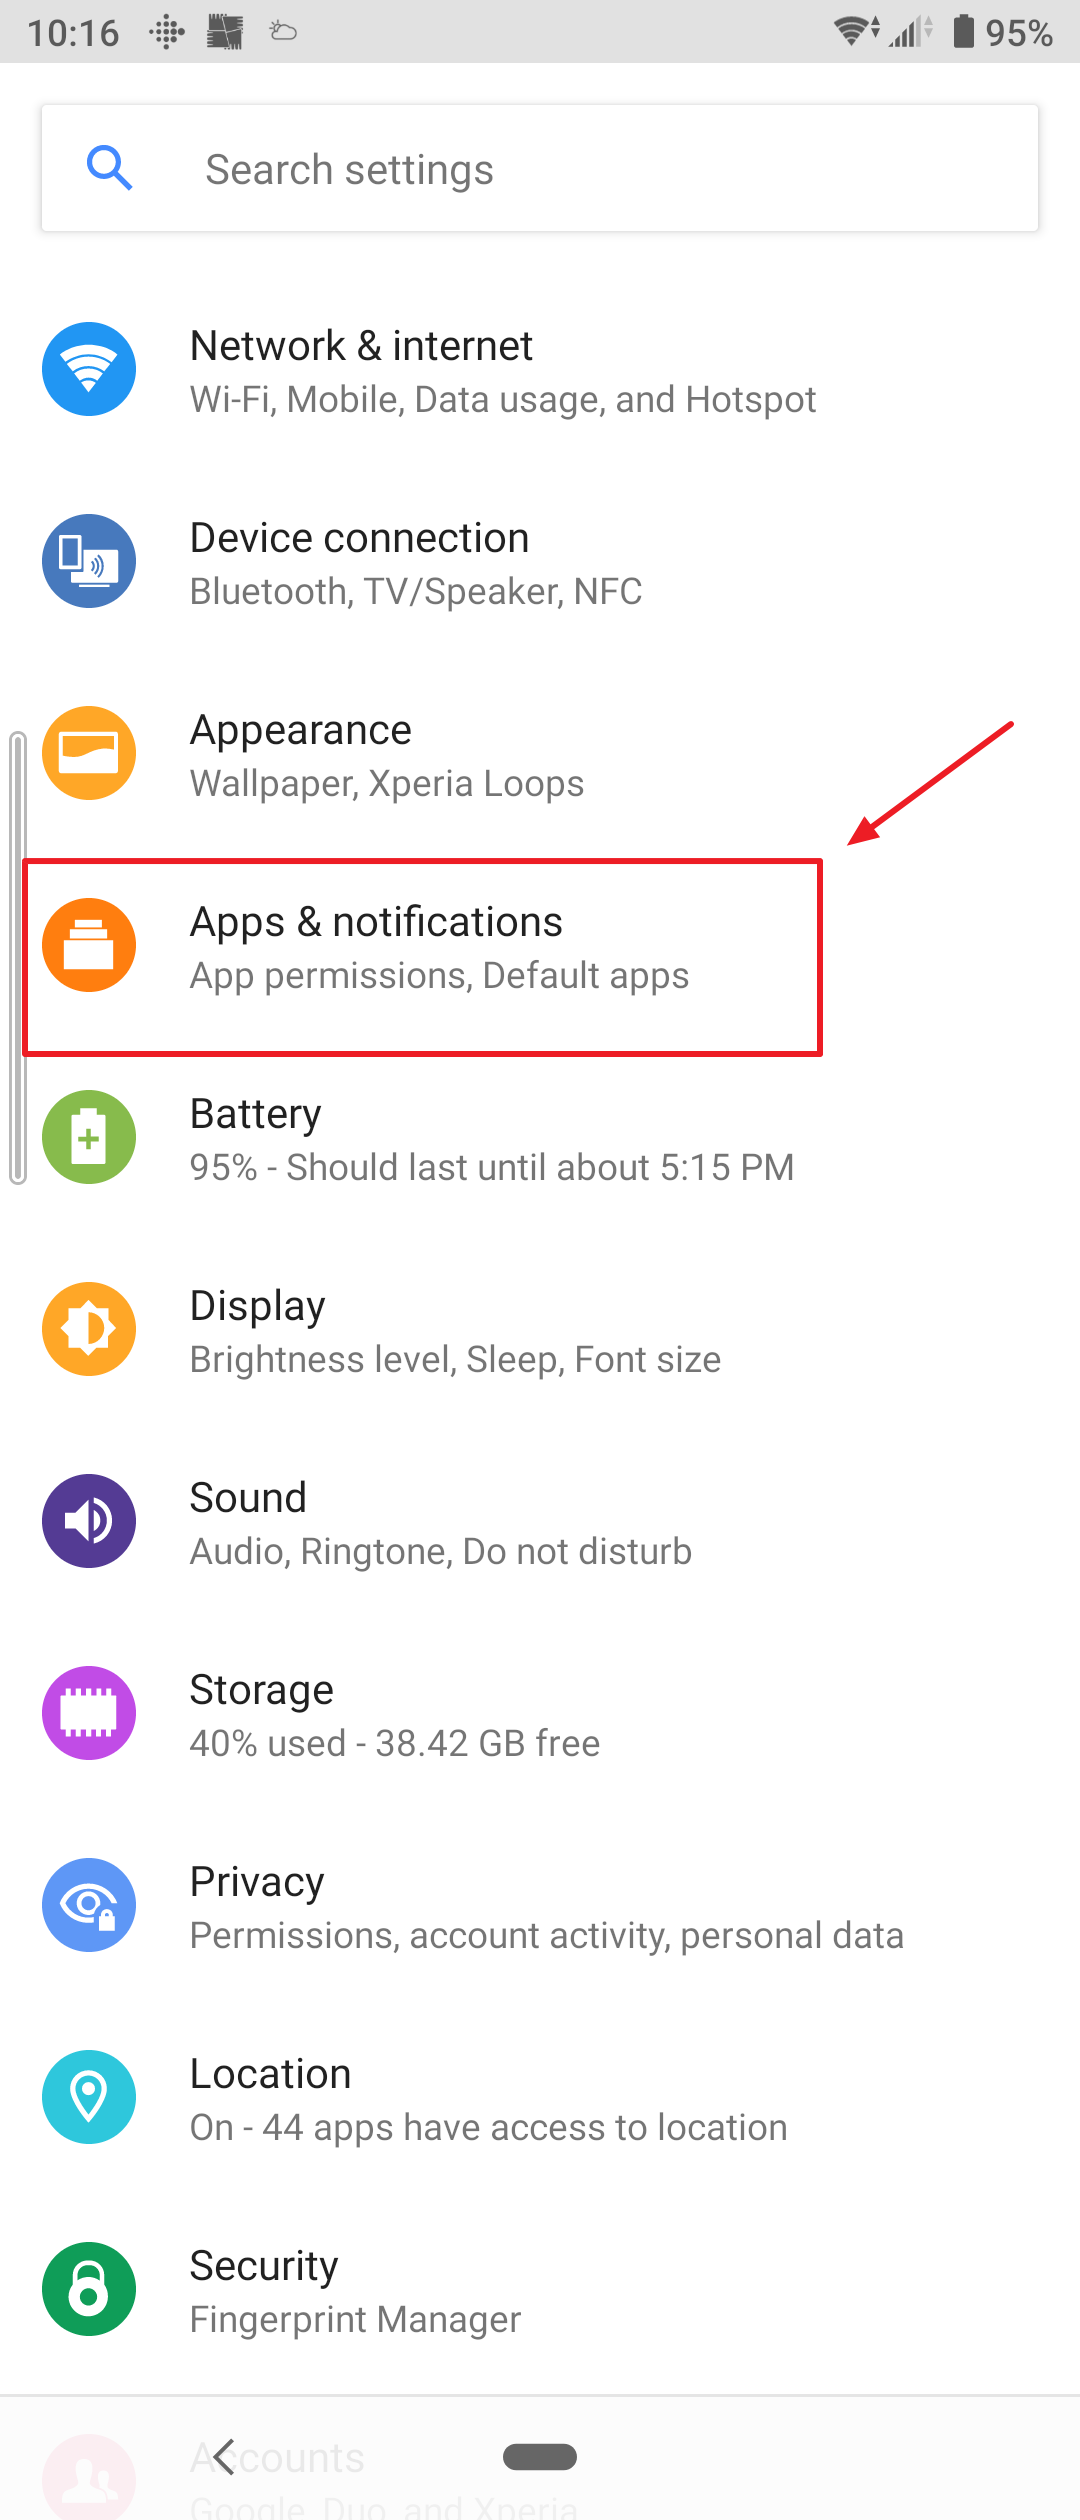
1. Go to your phone settings and then open the “Apps and notifications” settings
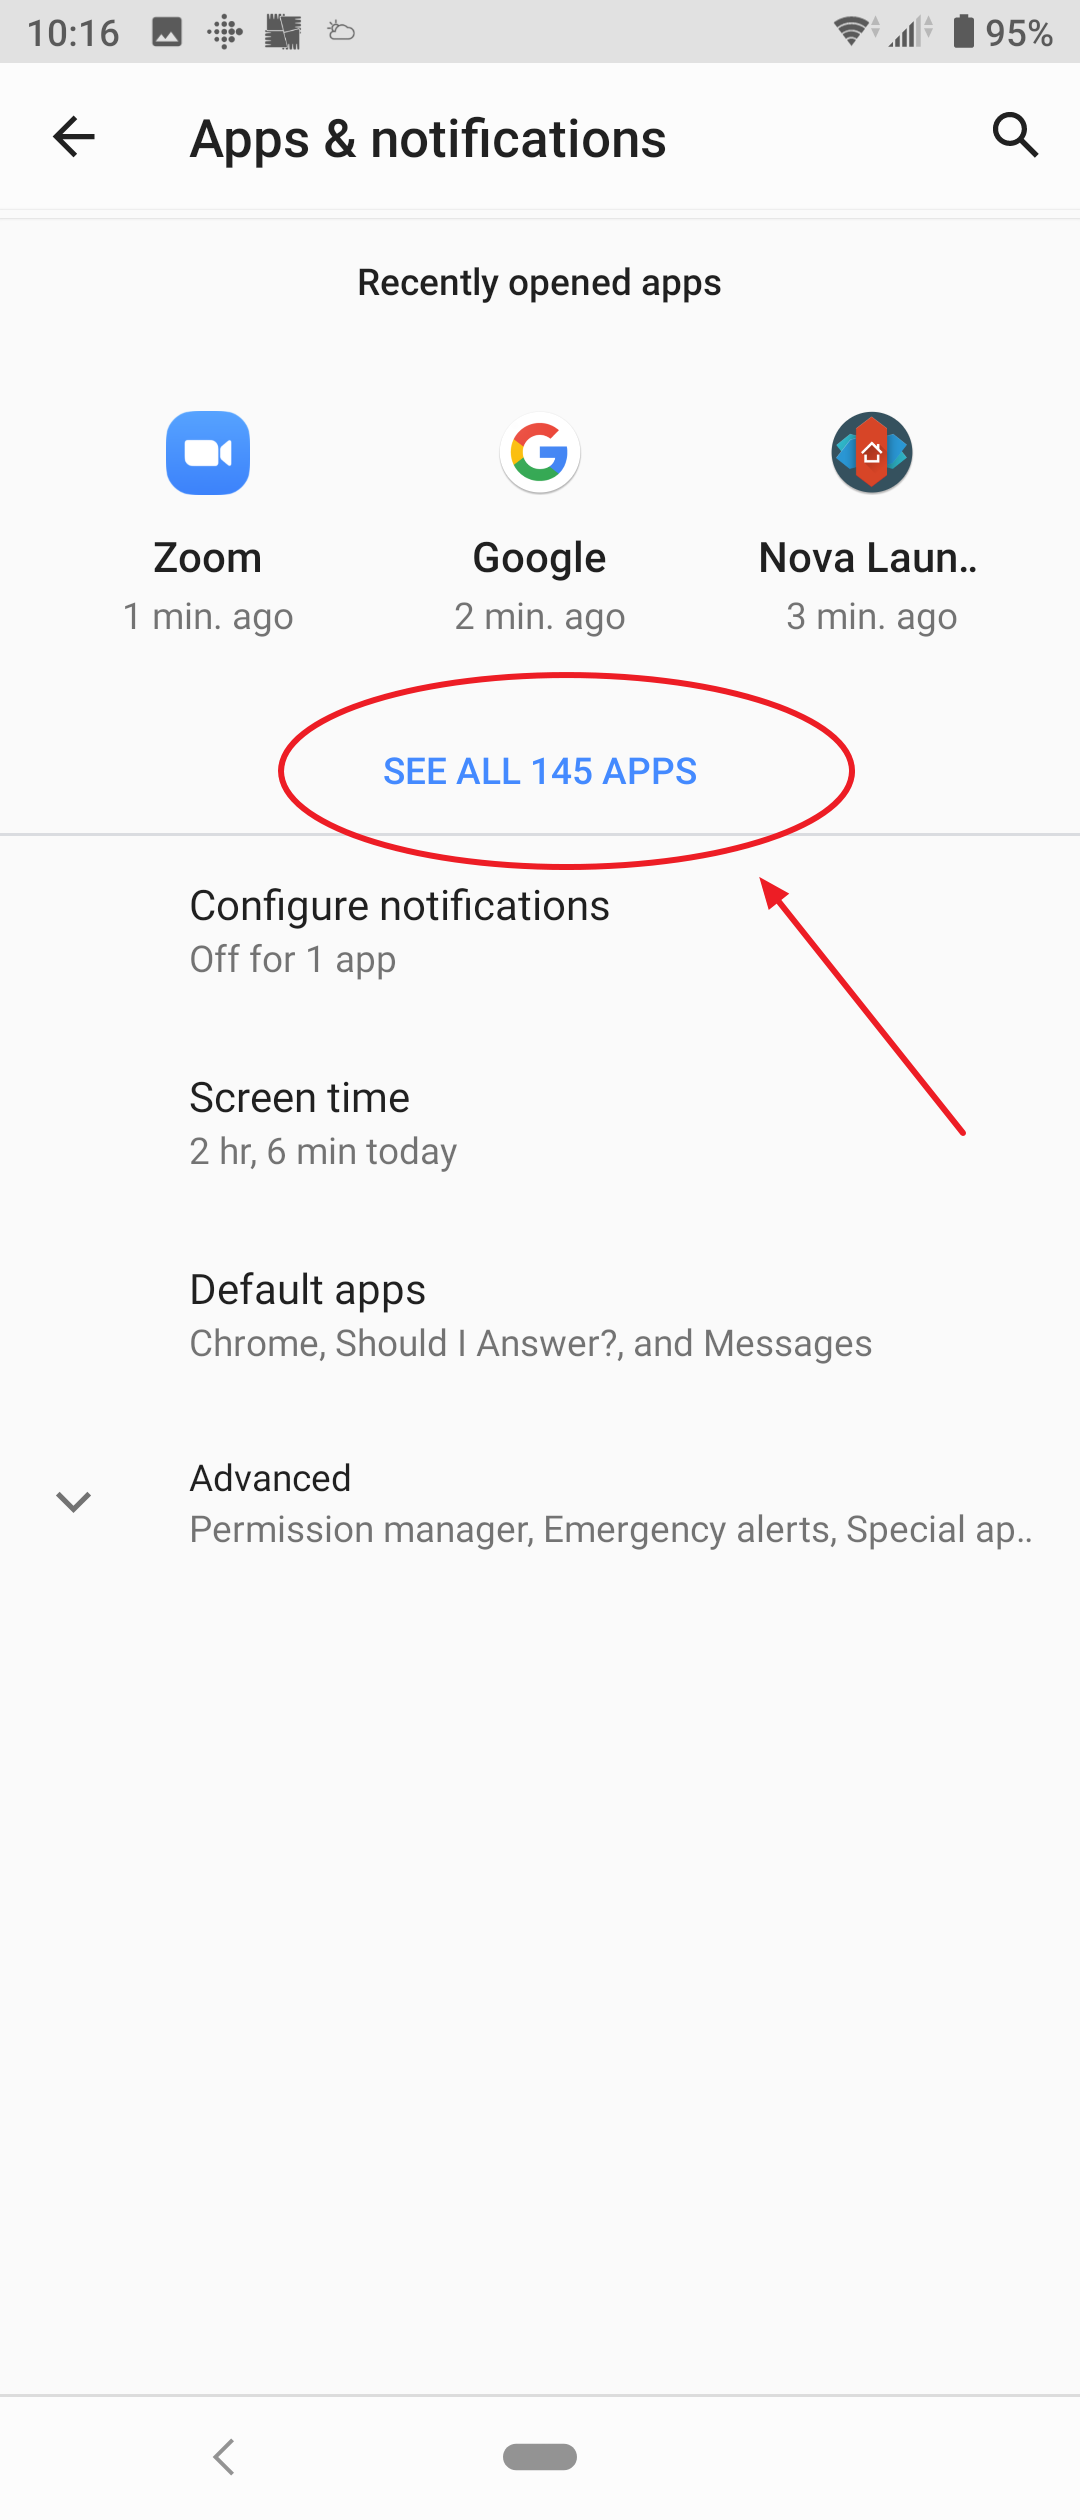
2. Click on the link to see all your apps

3. Find the “Google” app and click on it to open its settings
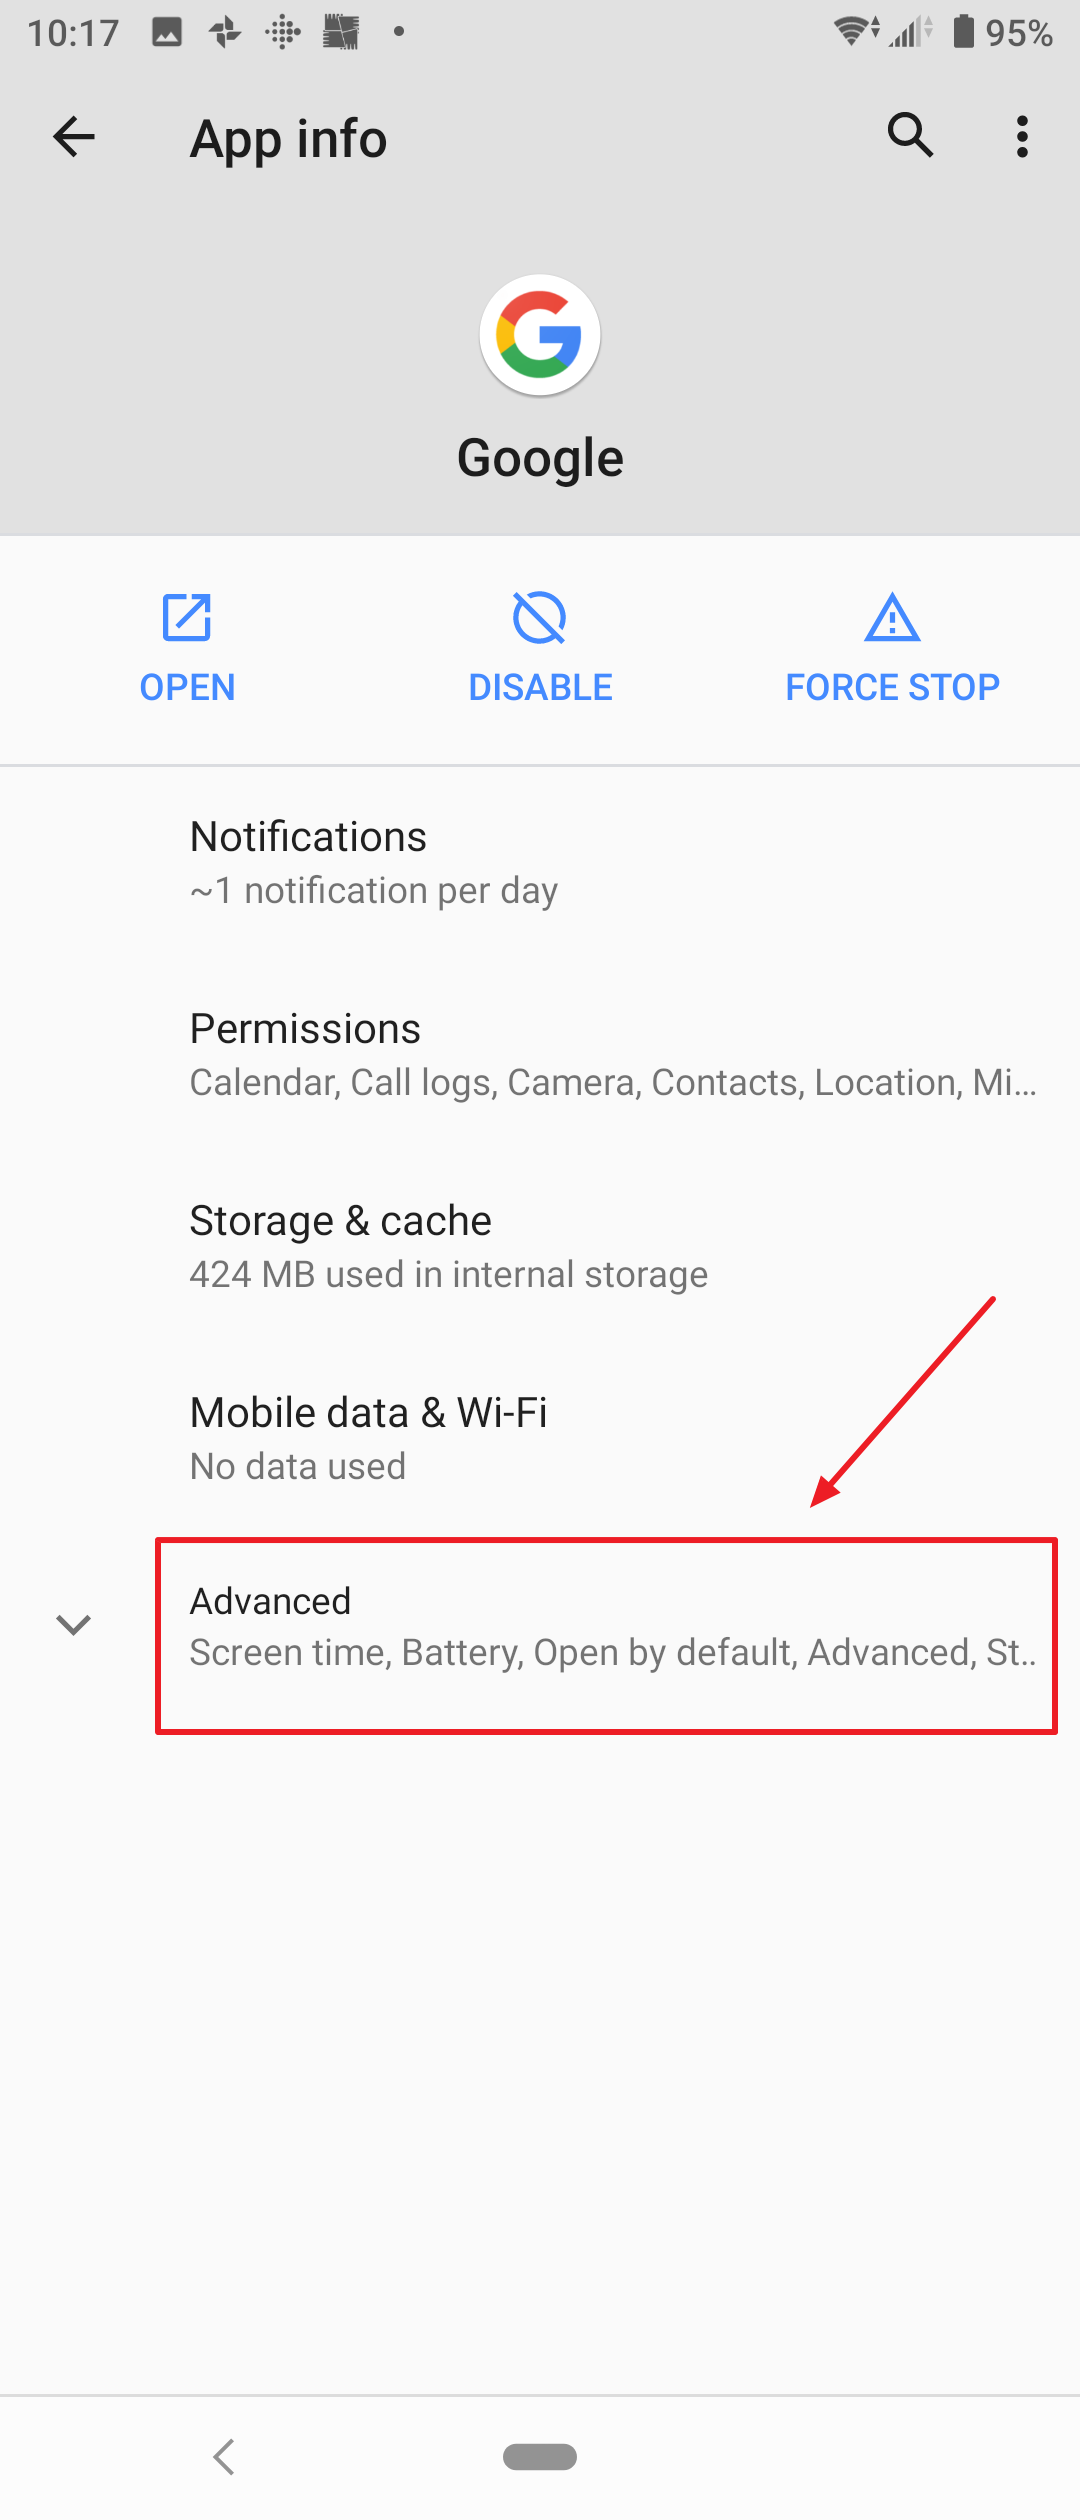
4. Click on the “Advanced” item to expand its settings

5. Ensure the “Display over other apps” setting is set to “Not allowed” in order to disable it
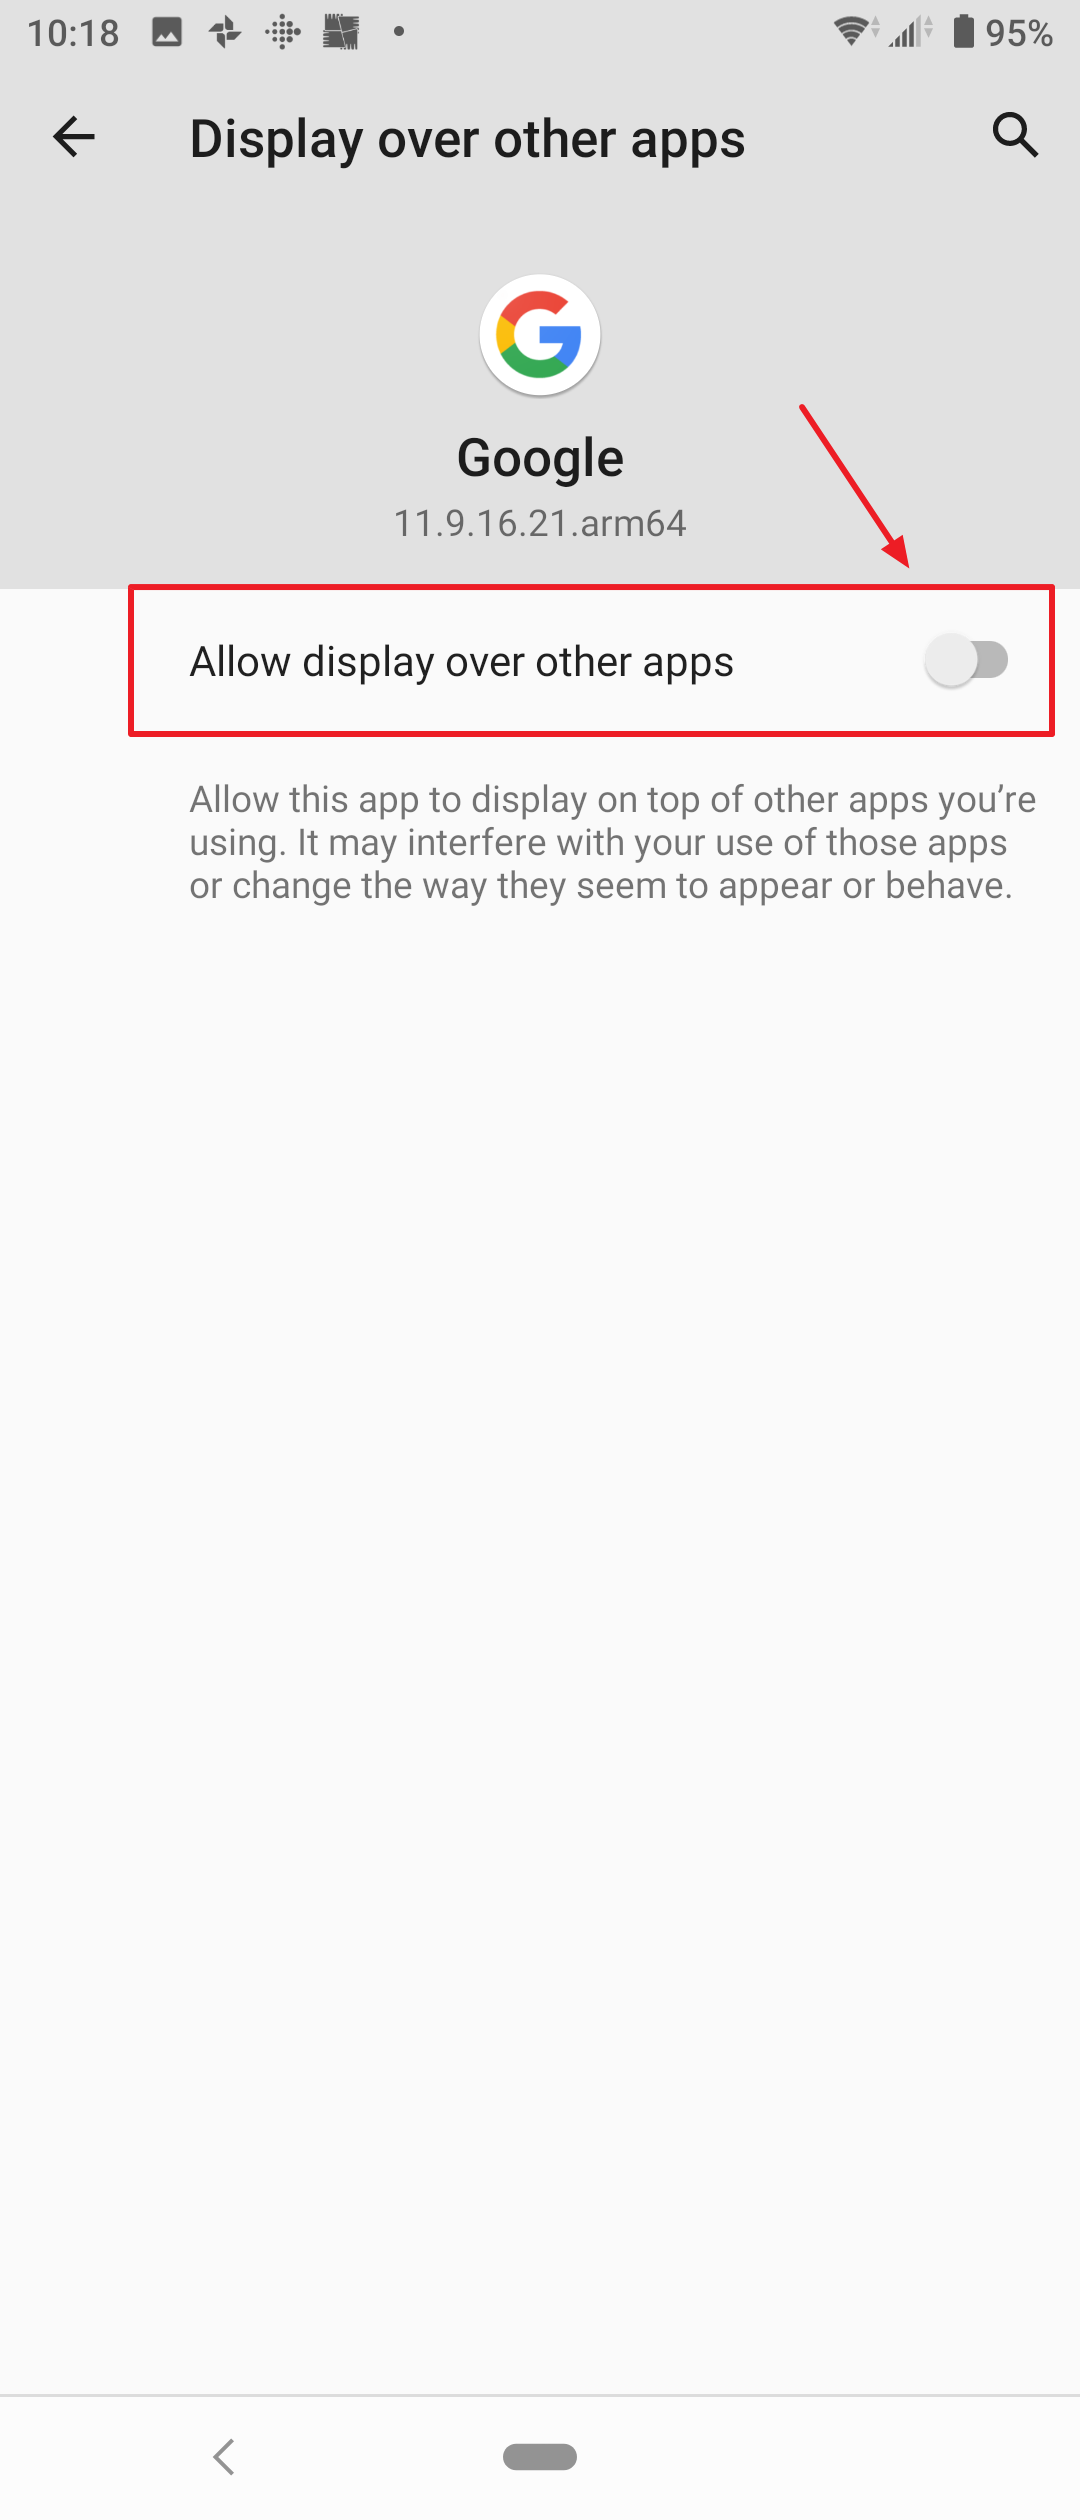
6. If the “Display over other apps” setting is enabled, click on the setting to open it and then disable it by clicking on the toggle button pointed out in the screenshot. When the setting it is disabled, the toggle button will appear grayed out as shown in the screenshot.