Installing Windows XP x64 with AHCI Enabled on a Gigabyte GA-P35-DS3R Motherboard

There are two SATA controllers on the motherboard. The Intel SATA interface and the Gigabyte (JMicron) SATA interface. In order for AHCI to work with the Intel SATA interface, you must install the drivers at Windows install time or you can perform a hack after Windows is installed. Here is what you need to do for a clean install of Windows XP x64:

  1. Make the Windows x64 “pre-installation” driver floppy disk for the Intel SATA controller. You can get this off the Gigabyte website with the other motherboard drivers.
  2. In the BIOS enable AHCI for the Intel interface but set the Gigabyte SATA interface to “IDE” mode. If you don’t set the Gigabyte interface to “IDE” mode then the Windows setup program will not see drives connected to that interface.
  3. Boot off the Windows XP x64 installation CD and press “F6” when the installation program prompts to do so in order to install the Intel SATA interface drivers off the driver floppy disk you made in step one.
  4. Complete the installation of Windows XP x64.
  5. Download the Gigabyte SATA interface driver from the Gigabyte website and install it in Windows. Then reboot the computer.
  6. When the computer reboots, enter the BIOS
  7. Enable AHCI for the Gigabyte SATA interface and then save the change.
  8. When Windows XP x64 boot, it should recognize the AHCI mode of the Gigabyte SATA interface and install the drivers. Then it will prompt you to reboot.
  9. After Windows XP x64 reboots, the Gigabyte SATA interface will now be in AHCI mode.
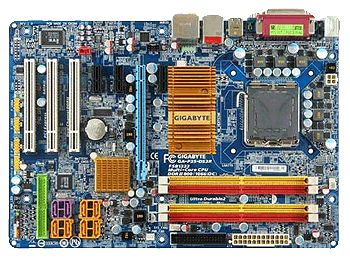
Gigabyte GA-P35-DS3R Motherboard

How to Extract the Windows Driver CD From Boot Camp Assistant

Burn the DMG image file located in the “Resources” folder which is inside the Boot Camp Package. The Boot Camp package is in the utilities folder and is what you click on to run Boot Camp Assistant.

  1. Right-click over the Boot Camp Assistant app in the Utilities folder.
  2. Select “Show Package Contents”
  3. Open the Contents folder and then the Resources folder
  4. Burn the DMG image file in that folder. The DMG image file will probably be named DiskImage.dmg

NOTE: These procedures are for Boot Camp beta running in Mac OS X Tiger 10.4. In Mac OS X 10.5 Leopard you can just use the Leopard install CD/DVD as the Windows driver CD.

iMac XP

Access Windows Live Hotmail in Outlook

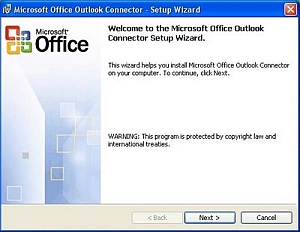
Microsoft Office Outlook Connector is a free program released by Microsoft which will allow you to access your Hotmail and Microsoft Office Live email accounts from within Outlook. Here is Microsoft’s official description of the application:

With Outlook Connector, you can use Outlook 2003 or Outlook 2007 to access and manage your Windows Live Hotmail or Office Live Mail accounts, including e-mail messages and contacts for free! Calendar, tasks and notes synchronization are not available on all services. If your service offers calendar synchronization, tasks and notes will synchronize as well. See the feature list for your service for details.

Outlook Connector enables you to use your Live Hotmail accounts within Outlook:

  • Read and send your Office Live Mail/Windows Live Hotmail e-mail messages.
  • Manage your Live Mail Contacts.
  • Use advanced options for blocking junk e-mail messages.
  • Manage multiple e-mail accounts in one place.

With a paid subscription, Outlook Connector enables these additional features:

  • Manage, share, and synchronize your Windows Live Calendar in Outlook.
  • Access your Tasks and Notes.

You can download the application from Microsoft from this web page: Link

Microsoft Office Connector

10.5 Leopard – “Disk error” After Installing Windows Using Boot Camp Assistant

Problem: After running Boot Camp Assistant and doing an initial install of Windows, you get the error message “Press any key to boot from CD. Disk Error. Press any key to restart.” when initially booting into the Windows partition after Windows setup completes. This problem is described in this apple support document: http://docs.info.apple.com/article.html?artnum=306504

Solution: You need to actually reformat the Windows partition that Boot Camp created. It will be the parition named “BOOTCAMP”. IMPORTANT: Do not use the option named “Leave the current file system intact (no changes)”. Choose to either format the BOOTCAMP partition as either NTFS or FAT format. If you format the partition in NTFS format, you will not be able to write to the drive while booted into OS X. You will have read-only access to it. However if you choose to format the drive as FAT then you will be able to both read and write to the Windows drive while booted into OS X. The advantage of NTFS is that it gives you finer grain control on file access and there is also a performance improvement.