After updating to Android 10 from Android 9 on a Sony Xperia 10 Plus phone, you may notice some apps no longer able to use your phone’s microphone. When you attempt to use affected apps, the app will act like your microphone is not working on your phone. For example on affected phones, when you try to use the Zoom or Viber video conferencing apps, people will be able to see your video but not hear you talking.
Various Google search results may lead you to try to totally disable or remove/uninstall the “Google” or “Google Play Services” apps but this fix will cripple your phone and you will not be able to use some Google phone functions and apps. An alternative solution you may find is to just “deny” the microphone privileges to these apps but this will also cripple some functions of your phone. Yet another solution you may encounter in Google searches is to disable the Google Assistant’s “ok google” voice activation feature.
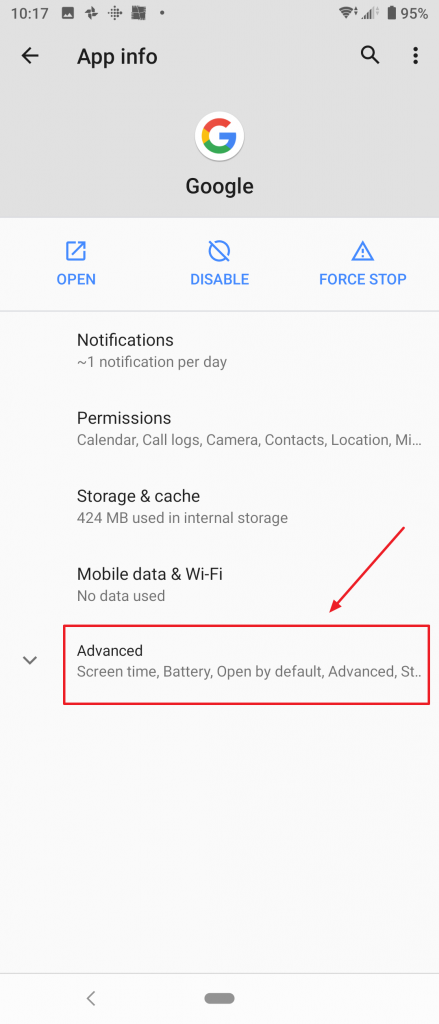
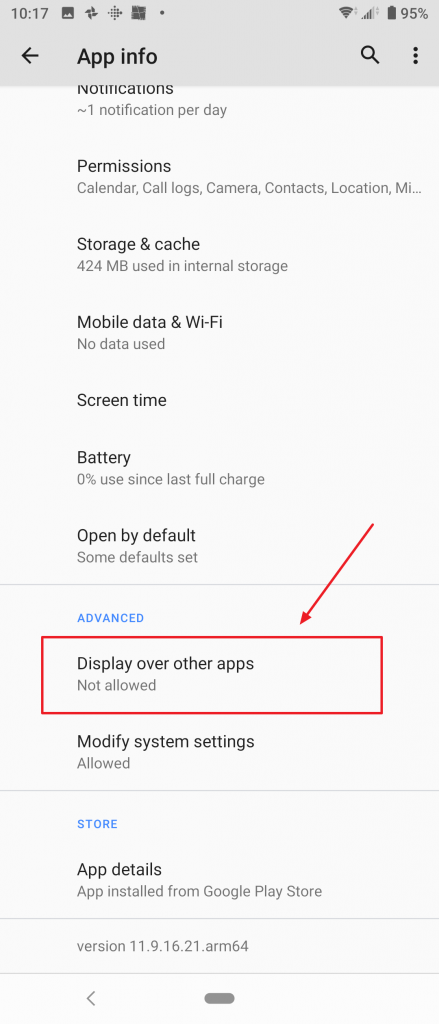
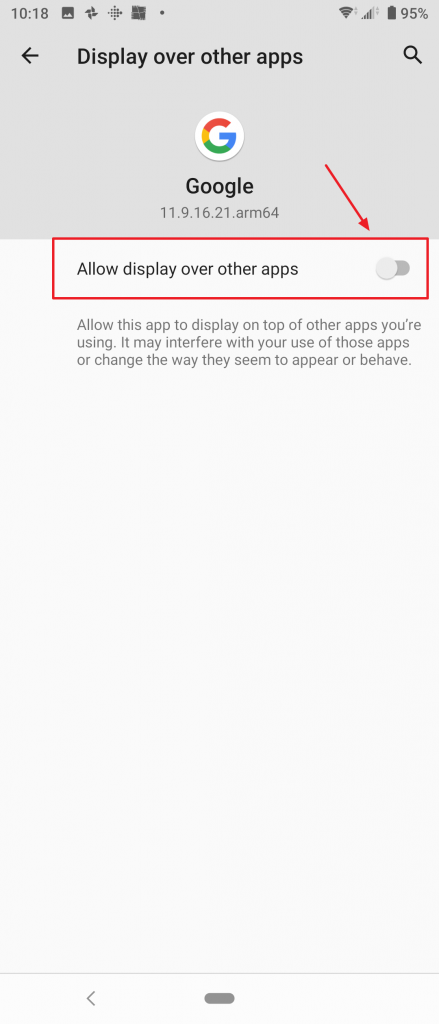
The best solution that worked for me is to disable the “Google” app permission for “Allow display over other apps“. Once I did this, all apps I was having problems with starting working again and from what I can tell all Google app related functions still work including the voice activation feature of Google Assistant. Even after a phone restart, everything still works. I believe what is happening is the “Google” app is running in the background and keeping a hold on the microphone. Only one app at a time can use the phone’s microphone so since the “Google” app is still running in the background and keeping a hold on the microphone, no other app can use it. Disabling the “Allow display over other apps” permission of the app allows other apps to take over use of the microphone when they are brought into the foreground.
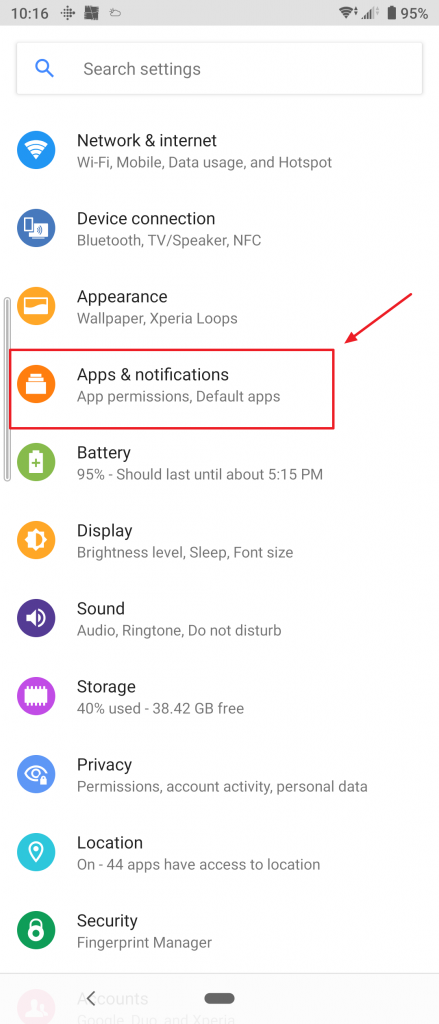
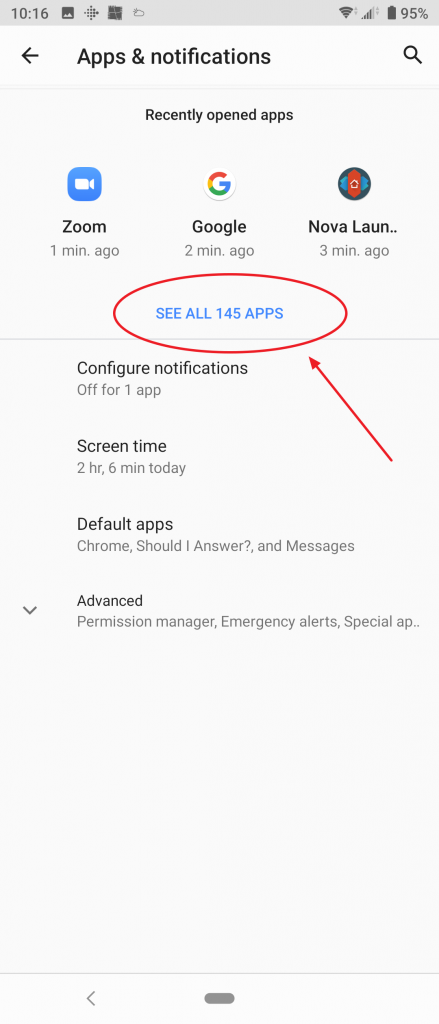
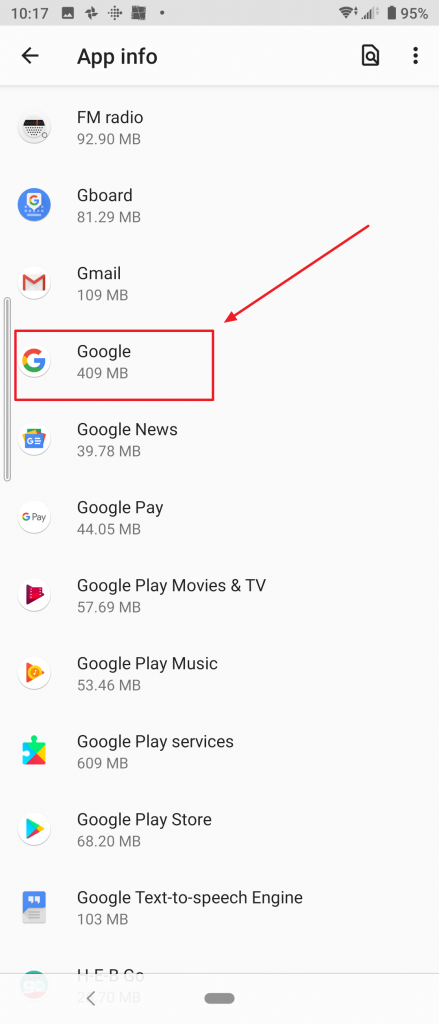
Here is the step-by-step procedure to disable the “Allow display over other apps” permission for the “Google” app:
