Outlook 2016 Error – A required action was not successful because of an unspecified error

When trying to digitally sign an email message in Outlook 2016 for Windows running in Windows 10 you may get this error:

Error - A required action was not successful because of an unspecified error
“A required action was not successful because of an unspecified error”

Encrypting emails works fine, it is only when you try to JUST sign an email you get this error. This error appears to only occur with Outlook x64 (64-bit). When you search the internet on the errorĀ “A required action was not successful because of an unspecified error” in relation to Outlook for Windows the most common solution you come across is to run the command “sfc /scannow” in an elevated command prompt. This didn’t work for me when I tried it on Windows 10 Enterprise (Current Branch) with Outlook 2016 for Windows. The solution that worked for me was in this forum post. The solution in that post was to enable the email security option “Request S/MIME receipt for all S/MIME signed messages”. Once I did that I was able to sign emails successfully without getting any errors. Sending emails to non-exchange email users with this option enabled doesn’t appear to have any adverse effects.

How to Add a Checkbox and Other Form Controls to an Excel 2007 Spreadsheet

Excel 2007 changed the menu system. You can only add form controls by using the “Developer” tab in the menu ribbon. By default the “Developer” tab is disabled. To enable the developer tab do the following:

  1. Click the circular Microsoft Office icon in the upper left corner of the Excel program
  2. Click the “Excel Options” button
  3. Select the left menu option “Popular”
  4. Check the option “Show the developer tab in the ribbon”
  5. Now the developer tab will appear on the ribbon. You can select the tab and press the “Insert” button to display check boxes and other form controls which can now be inserted into the spreadsheet.

How To Remove the Password or Document Protection on a Microsoft Word Document

These instructions are for the version of Word that comes with Microsoft Office XP or Office 2003. I will explain 3 different techniques so hopefully one of the three techniques will work for you.

Technique 1

1. Switch to the HTML code view of the Word document by using Microsoft Script Editor. You can launch the Microsoft Script Editor by pressing the ALT+SHIFT+F11 key combination while in Word.
2. Search for the word “Password” and you should find a block of text that looks like this:

<w:DocumentProtection>ReadOnly</w:DocumentProtection>
<w:UnprotectPassword>19E8E61E</w:UnprotectPassword>

3. You can remove the document protection by deleting those two lines and then save the document. When you reopen the document the protection should be gone. If you want to remove a document password then replace the password with “00000000”. So for the example above, you would replace “19E8E61E” with “00000000”. Save the document and close the script editor. When you reopen the document, the password should be gone.

Note: This technique does not work for “File Open” password protected Word files. Office encrypts these files with a 40 bit key which can not be bypassed with this technique.

Technique 2

This technique removes the “document protection” feature of a Microsoft Word XP or 2003 document.

1. Create a new Word document.

2. From the top menu bar select Insert | File and then browse for the Word document that you want to remove the password on.

3. Select the password protected Word document and select Insert which will insert the password protected Word document into the new empty Word document you just created.

4. Finally, select Tools from the top menu and confirm that there is no longer an “Unprotect document” menu item which will mean the document protection has been removed.

Technique 3

1. Open the document as “read-only”

2. Save it under a different file name but save it as “.rtf” file format

3. Open the .rtf document and then resave it as “.doc” file format

4. Done. The password should now be removed from the document. Some of the formatting may be a little off due to having saved it in .rtf format but the password should be removed.

Note: Similar to technique 1, this method does not work for “File Open” password protected Word files.

Microsoft Office Logo

Access Windows Live Hotmail in Outlook

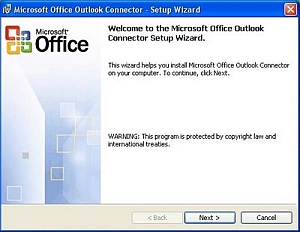
Microsoft Office Outlook Connector is a free program released by Microsoft which will allow you to access your Hotmail and Microsoft Office Live email accounts from within Outlook. Here is Microsoft’s official description of the application:

With Outlook Connector, you can use Outlook 2003 or Outlook 2007 to access and manage your Windows Live Hotmail or Office Live Mail accounts, including e-mail messages and contacts for free! Calendar, tasks and notes synchronization are not available on all services. If your service offers calendar synchronization, tasks and notes will synchronize as well. See the feature list for your service for details.

Outlook Connector enables you to use your Live Hotmail accounts within Outlook:

  • Read and send your Office Live Mail/Windows Live Hotmail e-mail messages.
  • Manage your Live Mail Contacts.
  • Use advanced options for blocking junk e-mail messages.
  • Manage multiple e-mail accounts in one place.

With a paid subscription, Outlook Connector enables these additional features:

  • Manage, share, and synchronize your Windows Live Calendar in Outlook.
  • Access your Tasks and Notes.

You can download the application from Microsoft from this web page: Link

Microsoft Office Connector